The Inventory Items page is your central hub for managing all raw materials, semi-finished products, packaging, and finished goods in your system.
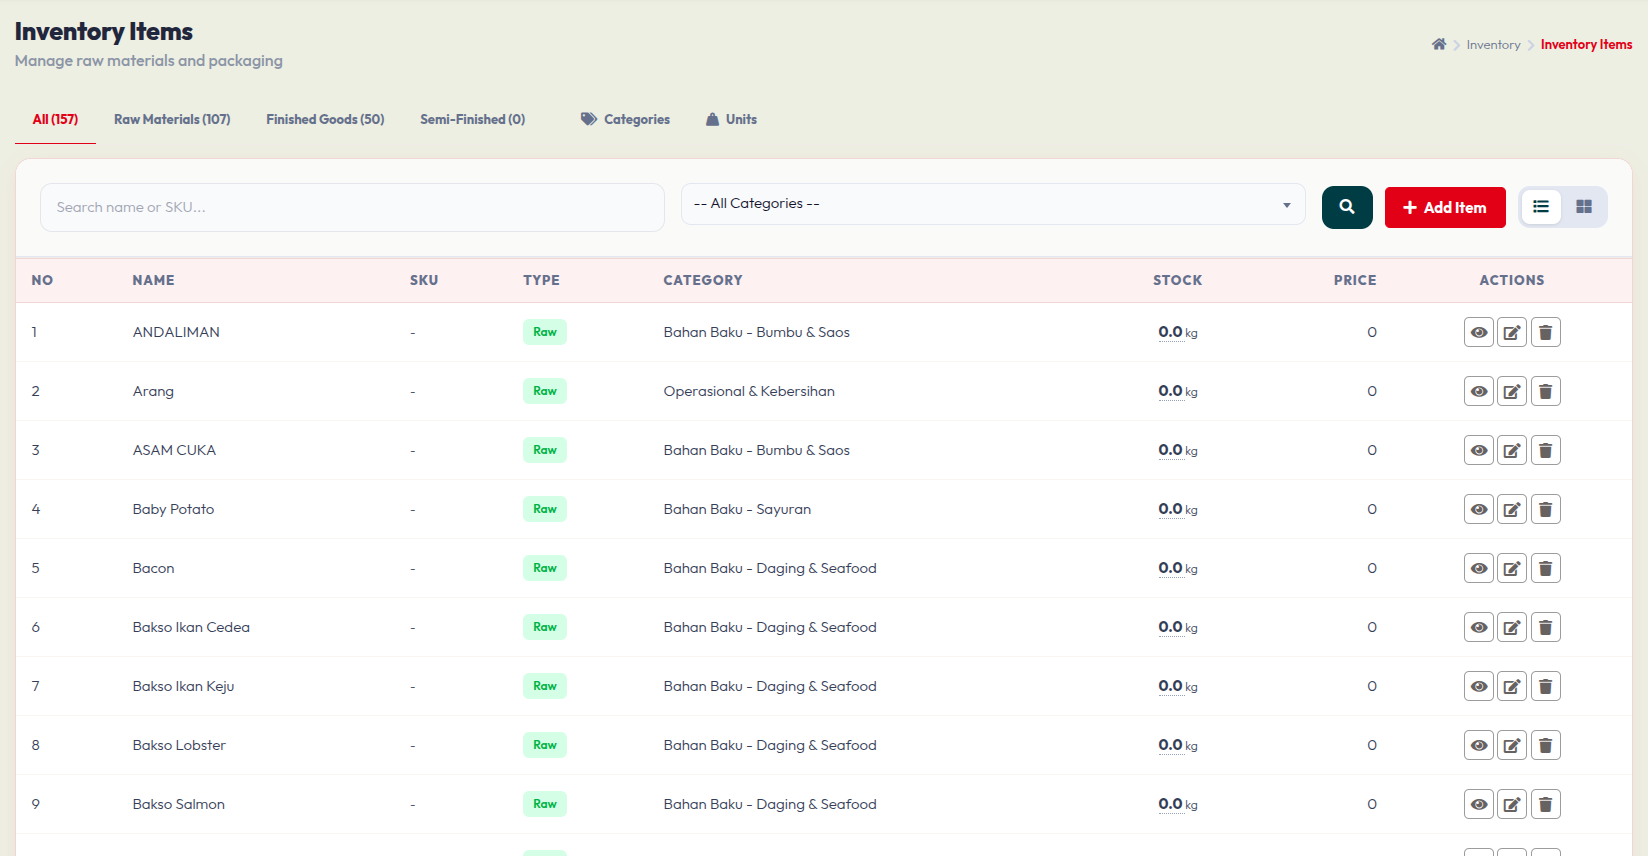
1. Managing Your Inventory Items
From the main dashboard, you can view and organize your entire catalog:
- Tabs Navigation: Use the top tabs to quickly filter the view by All, Raw Materials, Finished Goods, or Semi-Finished. You can also manage Categories and Units here.
- Search & Filter: Use the search bar to find an item by its name or SKU, or use the dropdown to filter by a specific category.
- Data Table: Displays the Name, SKU, Type (e.g., Raw), Category, current Stock level, and Purchase Price.
- Actions: On the right side of each item, use the Eye icon to view details, the Pencil icon to edit the item, or the Trash icon to delete it.
2. Adding a New Item (Raw Material)
To register a new ingredient or supply, click the red + Add Item button on the main page.
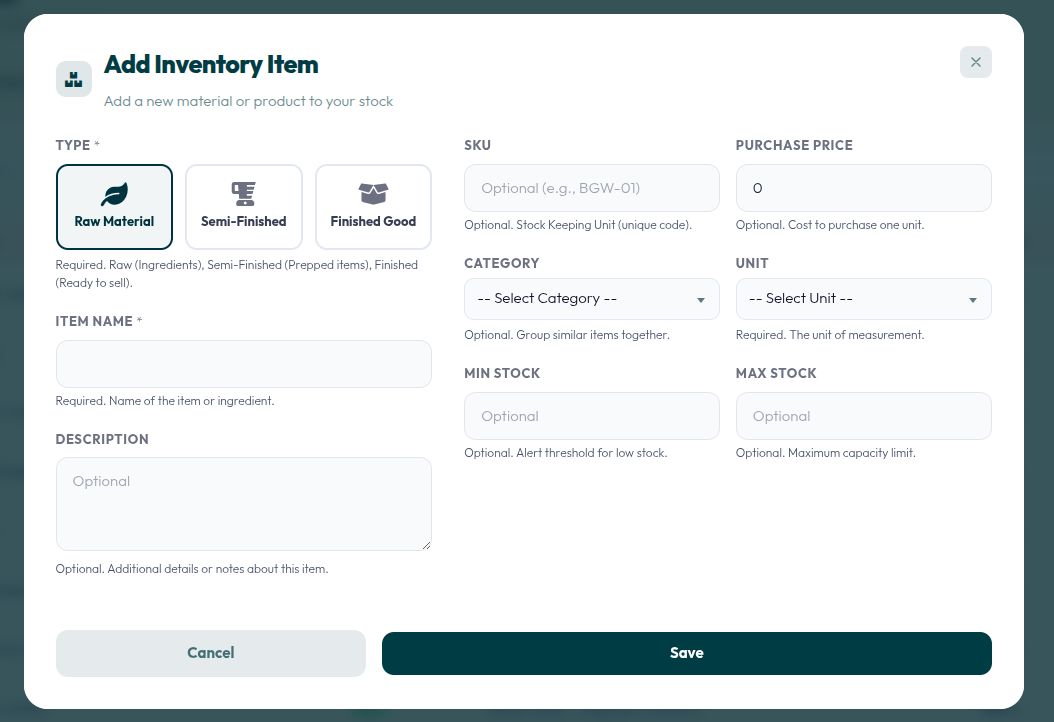
Follow these steps to complete the form:
- Type: Select Raw Material (for ingredients or supplies).
- Item Name: Enter the name of the ingredient (Required).
- Description: Add any optional notes about this item.
- SKU: Enter a unique stock-keeping unit code if you use them (Optional).
- Purchase Price: Enter the cost to purchase one unit of this item.
- Category & Unit: Select the appropriate grouping category and the unit of measurement (e.g., kg, pcs, liter). The unit is required.
- Min & Max Stock: Set the minimum threshold to trigger low-stock alerts, and the maximum capacity limit (Optional).
- Click Save to add the item to your inventory.
3. Adding a Finished Good (Linking to POS)
Adding a "Finished Good" (a product ready to sell) reveals additional options to automate your stock deductions.
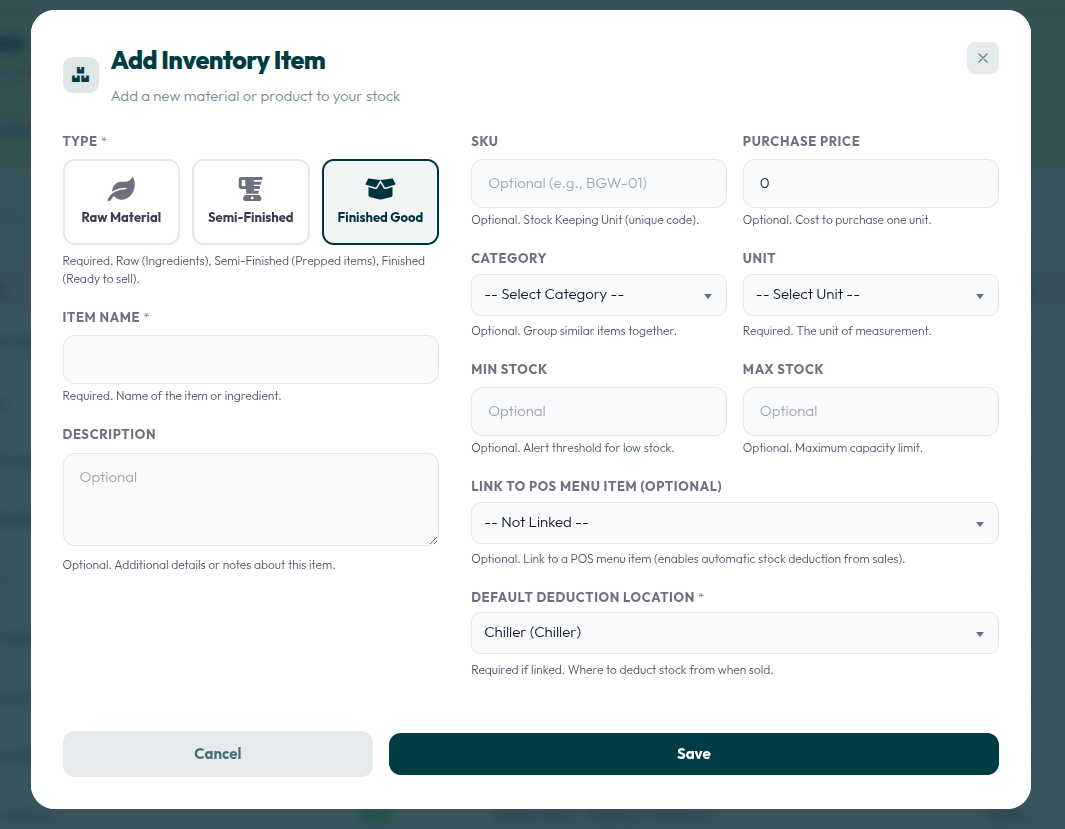
The steps are similar to adding a Raw Material, but with two important additions at the bottom of the form:
- Type: Make sure you select Finished Good at the top.
- Link to POS Menu Item: Use this dropdown to connect this inventory item to a specific product in your Point of Sale (POS) system. When the item is sold in the POS, the system will know which inventory item to deduct.
- Default Deduction Location: Choose the specific storage area (e.g., Chiller, Kitchen) where the stock should be automatically deducted from when a sale occurs.
4. Adding a Semi-Finished Item
A Semi-Finished item refers to prepped ingredients or components that are not yet final products but are no longer raw materials (e.g., marinated meat, pre-mixed sauces).
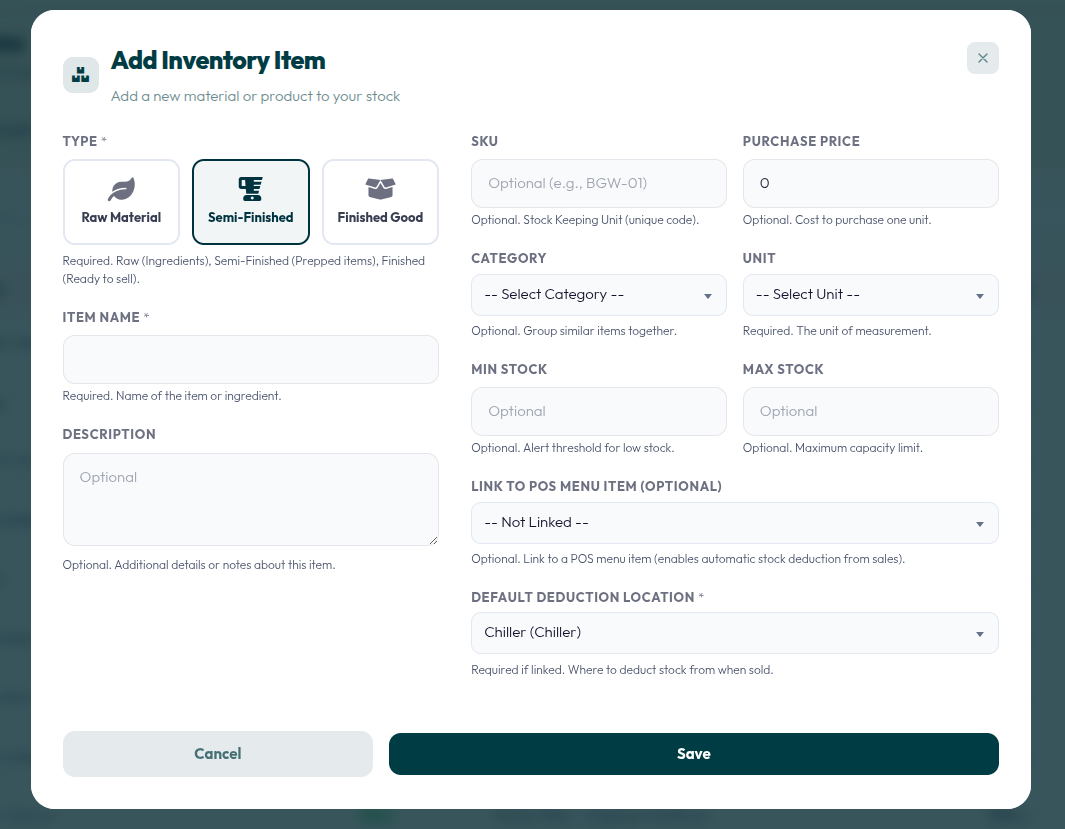
The process is nearly identical to adding a Finished Good:
- Type: Select the Semi-Finished option at the top.
- Fill in the essential details such as Item Name and the required Unit of measurement.
- POS Integration: Just like finished goods, you can optionally link this prepped item to a POS menu item and assign a Default Deduction Location if it gets sold directly or deducted as a bundle.
- Click Save to register the item in your inventory.