The Production Sessions page allows you to manage Make-to-Stock productions and execute your manufacturing recipes. When a production is completed, the system automatically deducts the raw materials and adds the finished goods to your inventory.
1. Viewing Production History
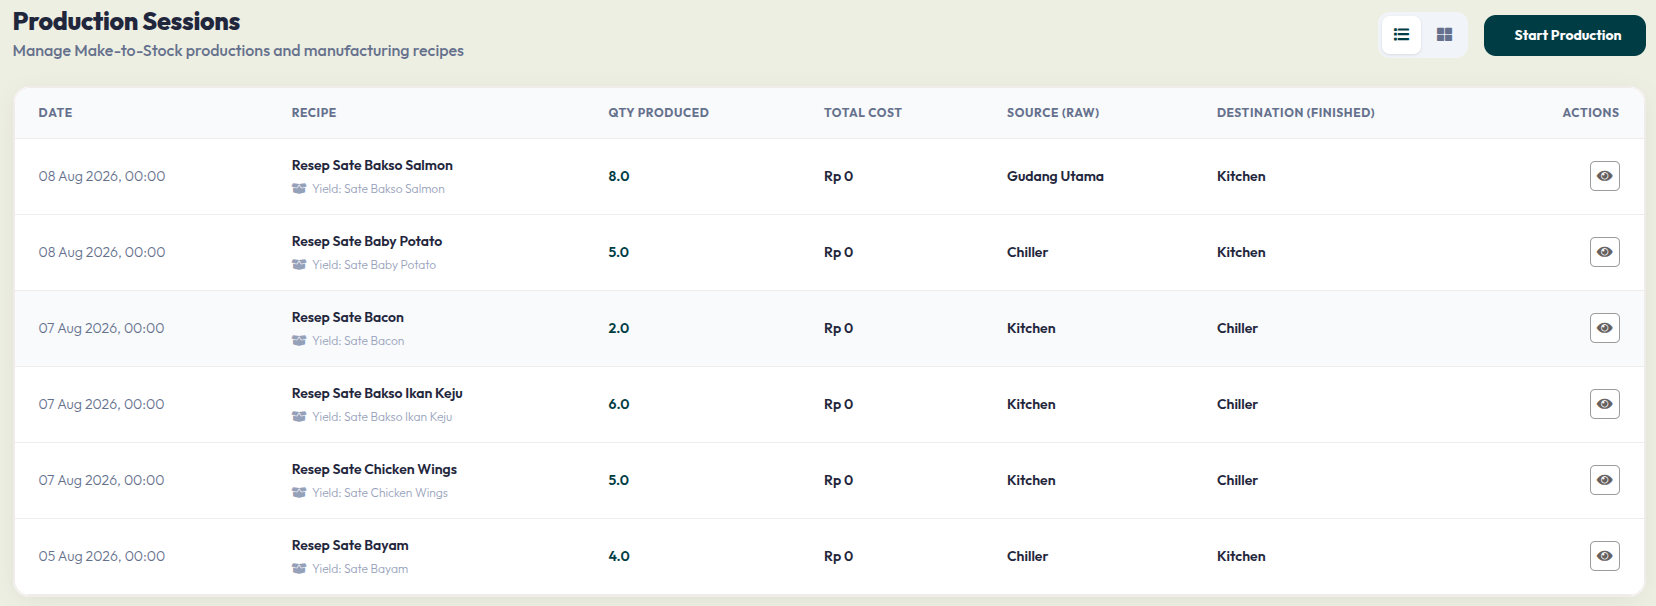
The main table acts as a log for all your past production runs. You can review the details of each session using the following columns:
- Date: The exact date and time the production was recorded.
- Recipe: The name of the recipe used and the specific target product yielded.
- Qty Produced: The total number of portions or units created during that session.
- Source (Raw) & Destination (Finished): Shows where the raw ingredients were taken from and where the final products were stored.
- Actions: Click the Eye icon to view the detailed breakdown of the production session.
2. Starting a New Production
To begin cooking or manufacturing a new batch of items, click the dark green Start Production button at the top right of the main page.
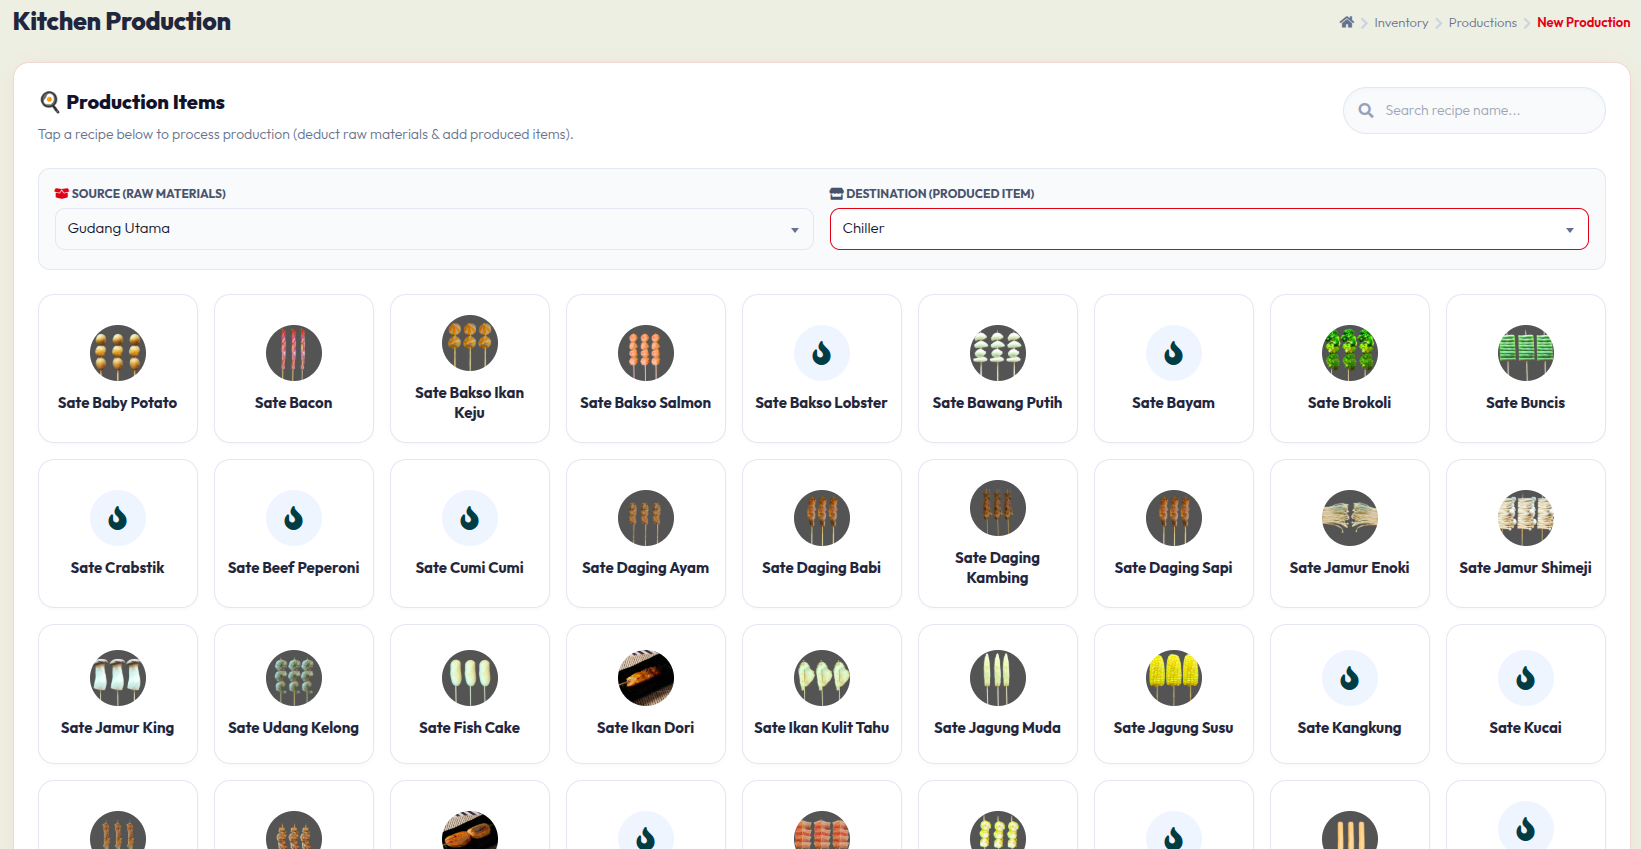
You will be directed to the Kitchen Production page. Follow these steps to process a recipe:
- Set Locations:Source (Raw Materials): Select the storage area from where the ingredients will be deducted (e.g., "Gudang Utama").
- Destination (Produced Item): Select the storage area where the finished goods will be placed (e.g., "Chiller").
- Select a Recipe: Browse the grid of available recipes (like "Sate Bakso Salmon" or "Sate Baby Potato") or use the search bar on the top right to find a specific one. Click on the recipe card you want to produce.
3. Confirming Production Quantity
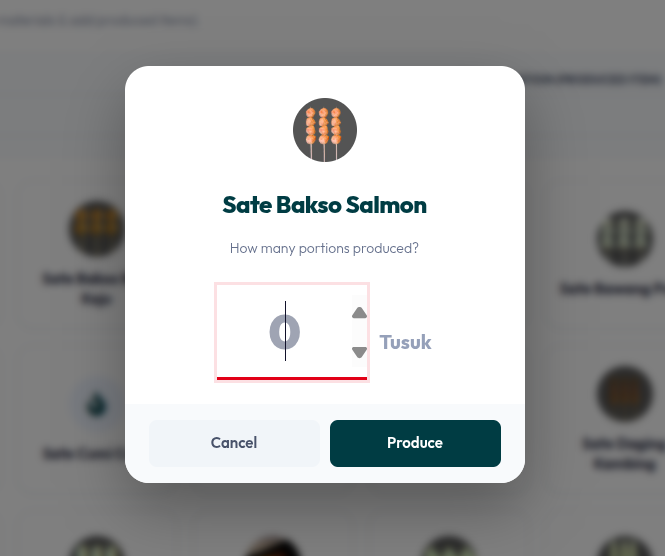
After clicking a recipe card, a pop-up window will appear asking for the exact quantity produced.
- Use the up and down arrows or type directly into the input field to set How many portions produced?.
- Verify the unit of measurement (e.g., "Tusuk").
- Click the Produce button to finalize the session. The system will instantly update your inventory based on the recipe's Bill of Materials (BOM).