The Categories tab helps you organize your inventory items into logical groups, making them easier to search, filter, and manage.
1. Viewing and Managing Categories
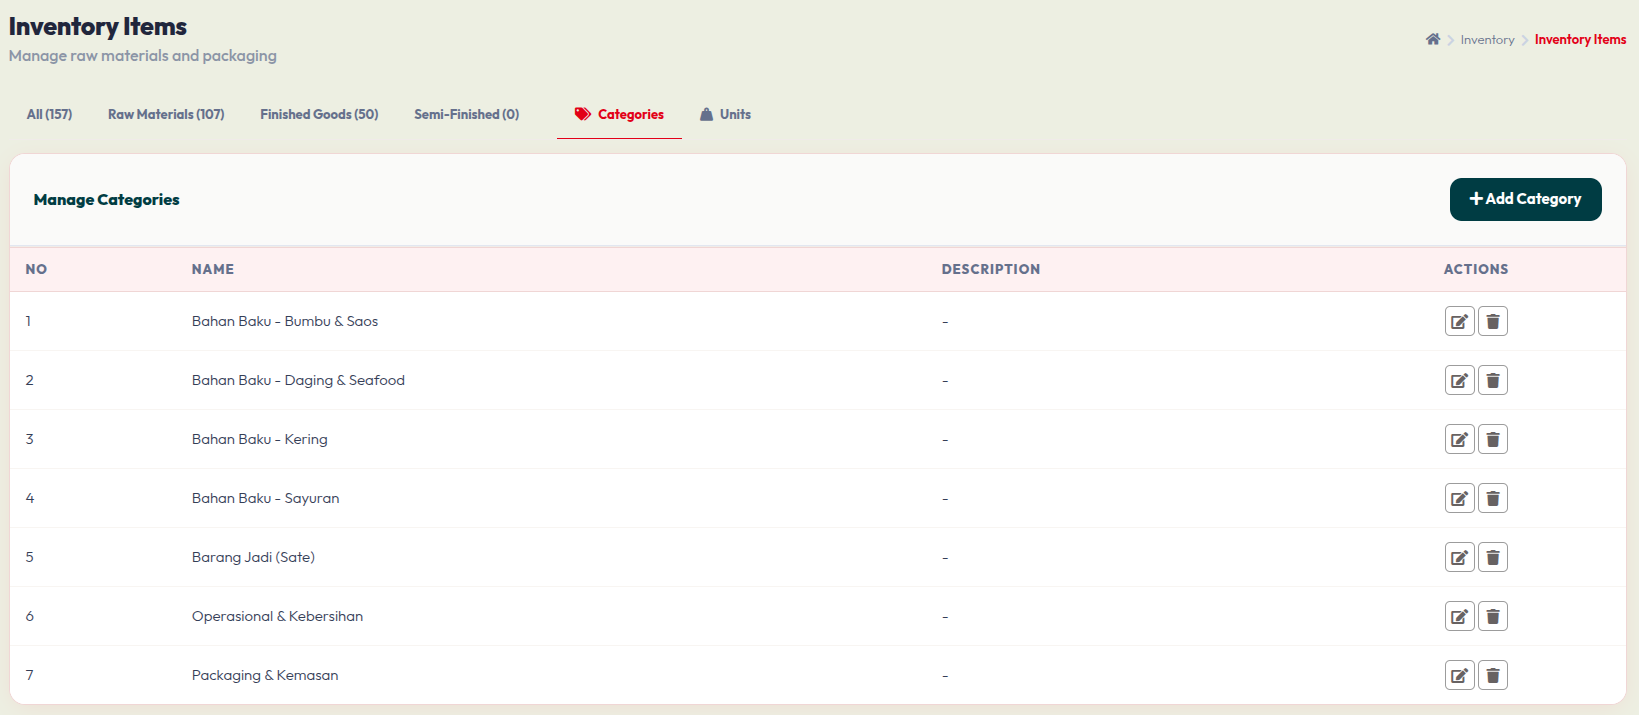
By clicking the Categories tab on the Inventory Items page, you can view all your existing item groupings:
- Data Table: The list displays the category Name (e.g., "Bahan Baku - Bumbu & Saos") and its Description.
- Actions: On the right side of each row, use the Pencil icon to edit an existing category or the Trash icon to delete a category that is no longer needed.
2. Adding a New Category
To create a new grouping for your items, click the + Add Category button located at the top right of the table.
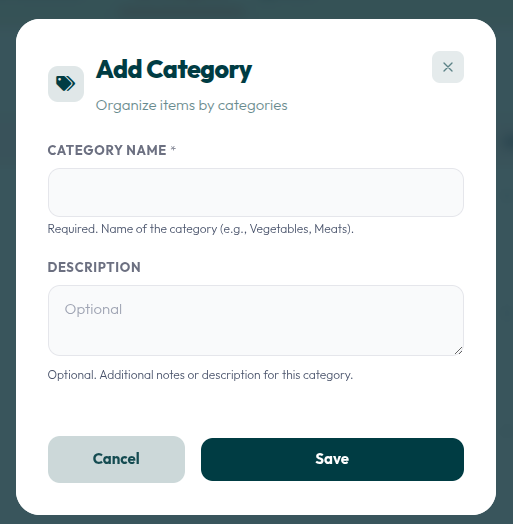
Follow these quick steps to add a category:
- Category Name: Type the name of your new category in this field (Required). Make it clear and descriptive (e.g., Vegetables, Meats, Packaging).
- Description: Add any extra notes or details about what belongs in this category (Optional).
- Click the Save button to create the category, or click Cancel if you want to discard the changes.