The Inventory Locations page allows you to manage all the different places where your stock is stored, such as warehouses, kitchens, or chillers.
1. Managing Existing Locations
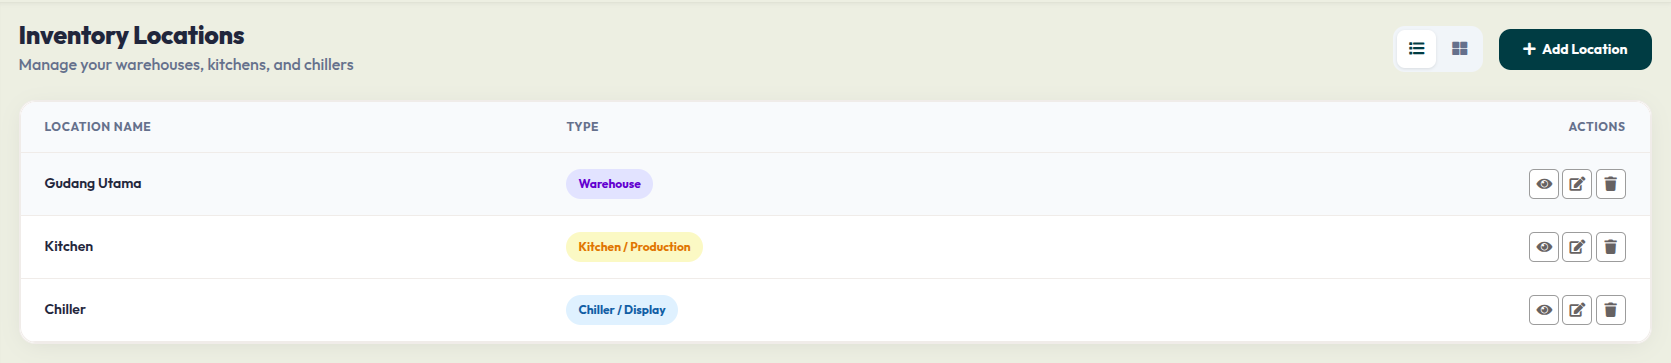
The main table displays your current storage areas. You can track and manage them using the following columns:
- Location Name: The designated name of the area (e.g., "Gudang Utama", "Kitchen").
- Type: The category of the location, which helps define its purpose (e.g., Warehouse, Kitchen / Production, Chiller / Display).
- Actions: Use the three icons on the right side of each row to manage the location:
- Eye Icon (View): Click to see the details and current stock within this specific location.
- Pencil Icon (Edit): Click to change the name or type of the location.
- Trash Bin Icon (Delete): Click to remove the location entirely. Note: Ensure no stock is assigned here before deleting.
2. Adding a New Location
If you expand your operations and need a new storage area, you can easily add one into the system.
Follow these steps to create a new location:
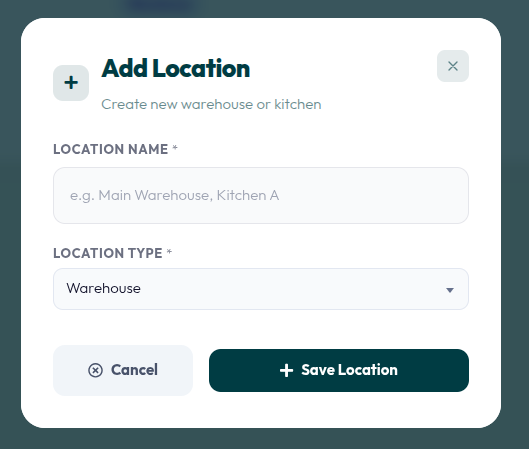
- Click the + Add Location button on the top right corner of the main Inventory Locations page.
- A pop-up form (as shown in the image above) will appear.
- In the Location Name field, type the name of your new storage area (e.g., "Main Warehouse" or "Kitchen A").
- Click the Location Type dropdown menu and select the category that best fits the area (e.g., Warehouse, Kitchen, etc.).
- Click the + Save Location button to finalize and add it to your list. If you change your mind, click Cancel.