The Areas feature allows you to logically group tables into different zones, such as Floor 1, VIP Room, Bar Seating, or Outdoor Area. The analogy is akin to a house floor plan dividing the living room and family room. This mapping makes it much easier for managers to monitor which areas are busiest and simplifies the allocation of waiter assignments to specific sections.
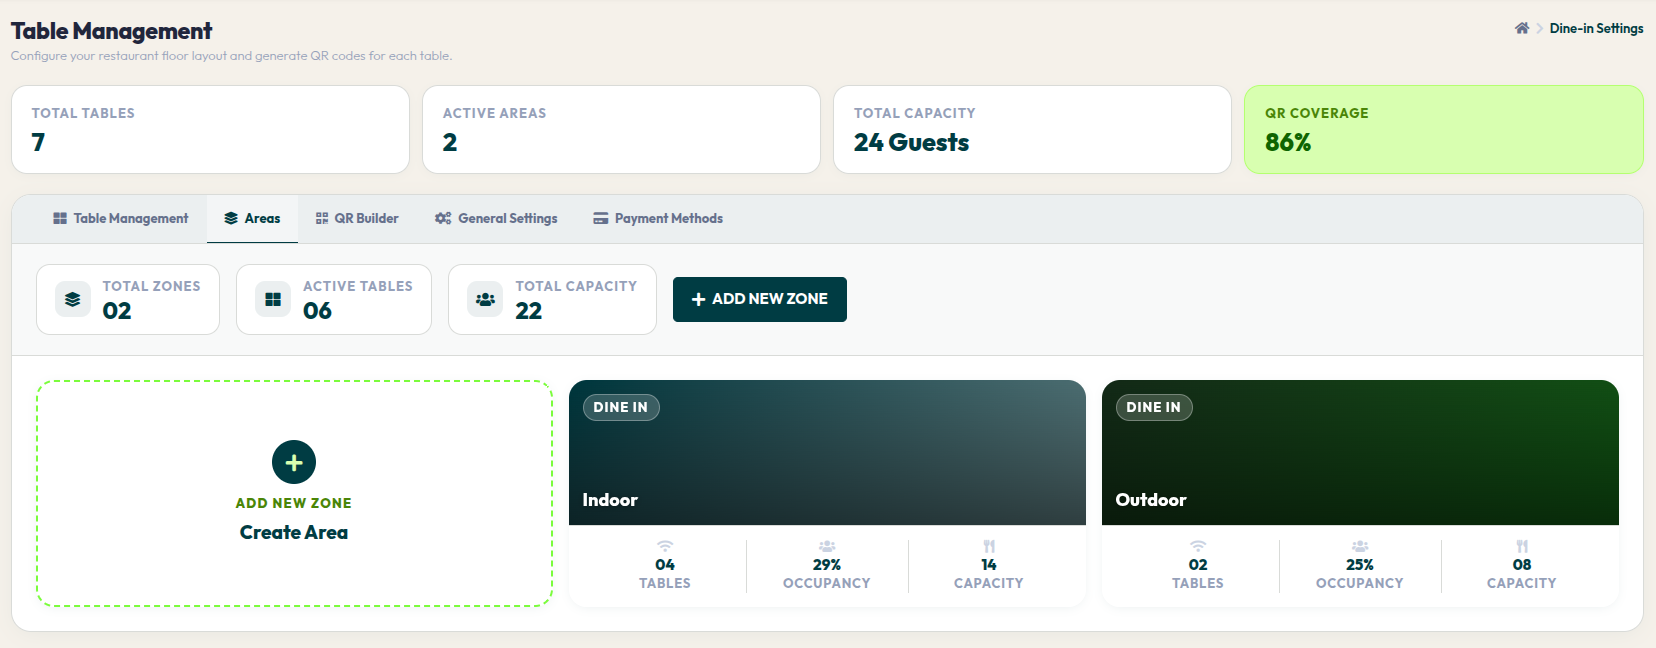
- Go to Orders > Dine-In Settings, then click the Areas tab.
- At the top, observe the summary metrics showing total zone divisions (TOTAL ZONES), the number of actively used tables (ACTIVE TABLES), and aggregate capacity (TOTAL CAPACITY).
- To create a new space mapping, click the red + Add New Zone button in the top panel, or click the empty dashed card labeled Create Area.
- Each saved area card will act as a mini-dashboard; displaying service labels (Dine In/Pickup), registered table counts (TABLES), crowd density percentages (OCCUPANCY), and maximum visitor limits (CAPACITY).
By grouping areas strategically, you gain full control over every corner of your restaurant. Use these insights to optimize service and ensure guests get the best seating according to their needs.