This guide explains the workflow for managing Purchase Orders (PO) and processing incoming Goods Receipt Notes (GRN) to update your inventory levels.
1. Validating a Purchase Order
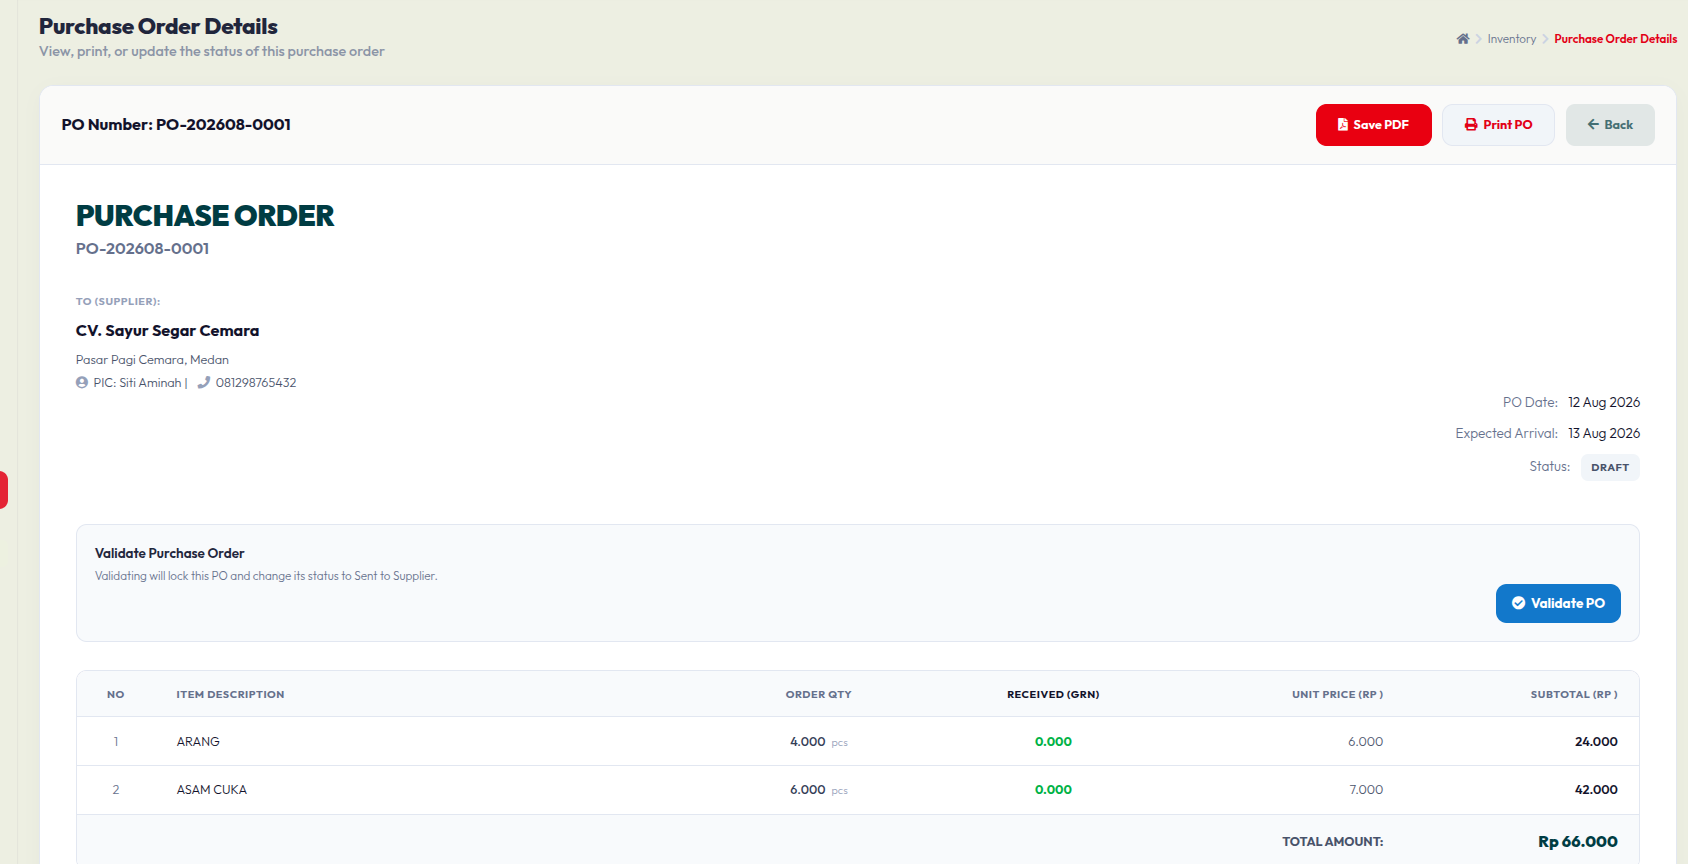
When you create a new PO, it starts as a Draft. To proceed:
- Review all items and quantities in the Purchase Order Details page.
- Click the Validate PO button. This locks the order and changes its status to Sent to Supplier.
2. Processing Goods Receipt Note (GRN)
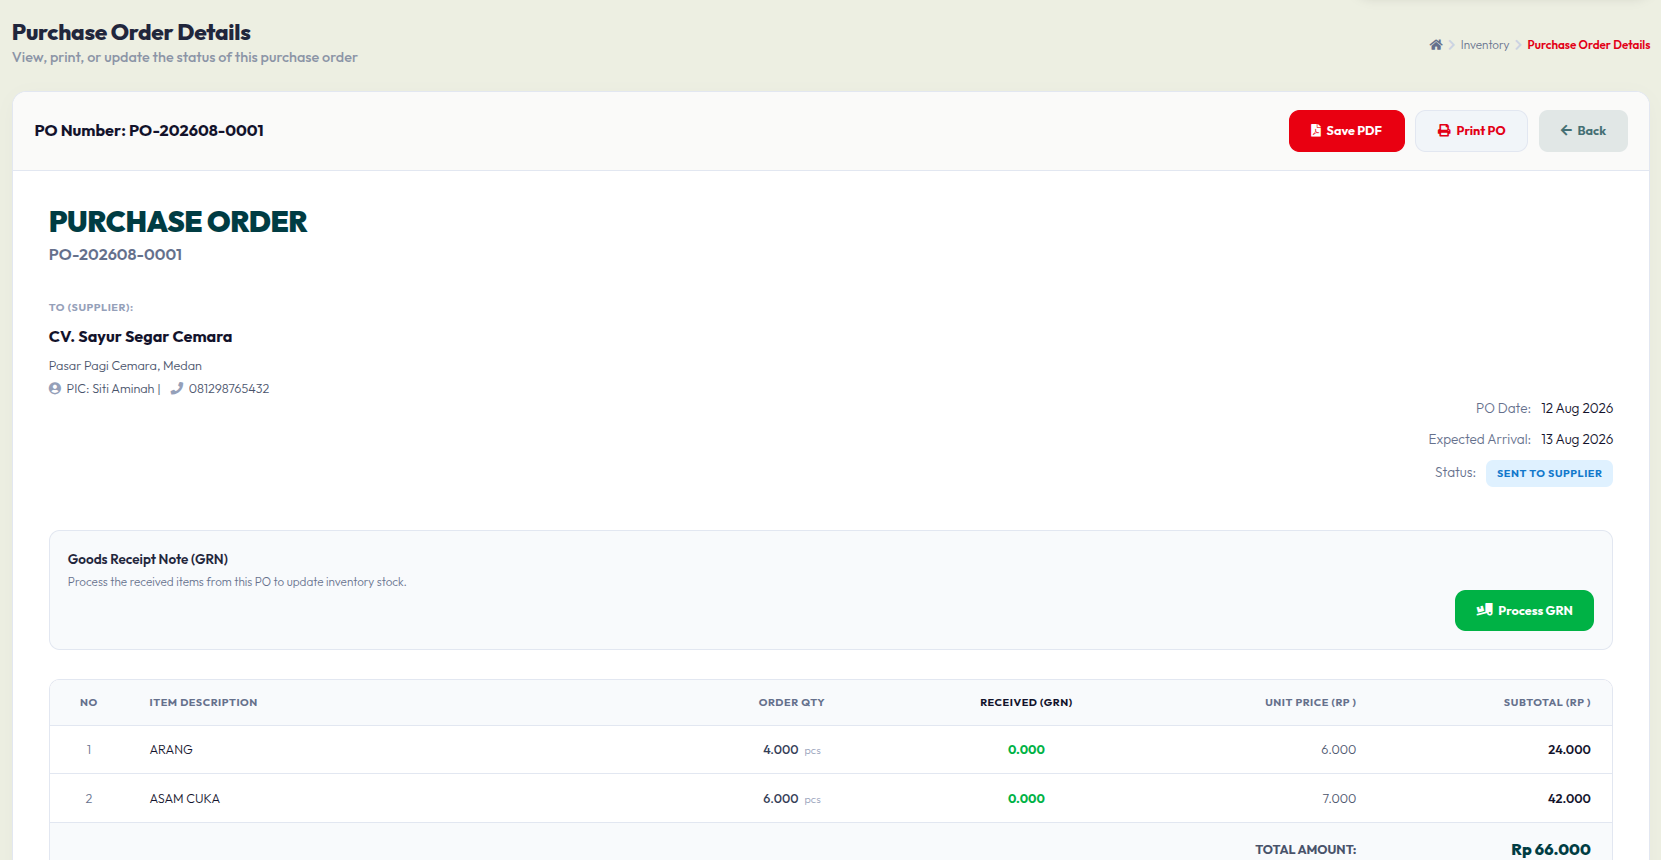
Once the goods arrive, you must record them in the system to update your stock:
- On the validated PO page, click the Process GRN button.
- You will be redirected to the Receive Goods interface.
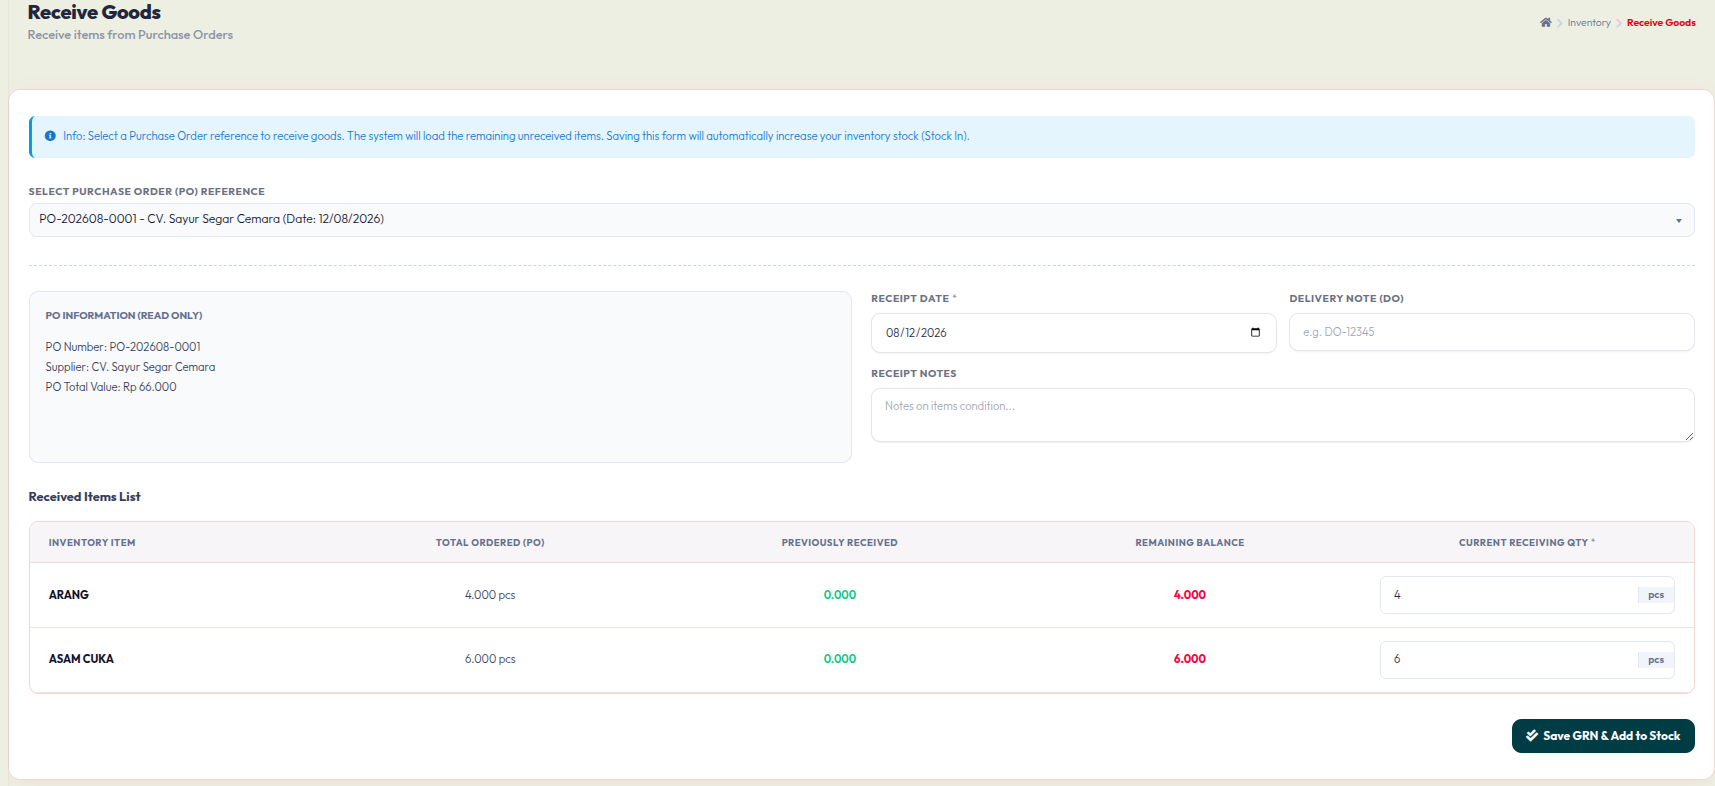
- Select the appropriate PO Reference to automatically load the pending items.
- Fill in the Receipt Date and optional Delivery Note (DO) number provided by the supplier.
- In the Received Items List, confirm the Current Receiving Qty for each item.
- Click Save GRN & Add to Stock.
3. Viewing Receipt History
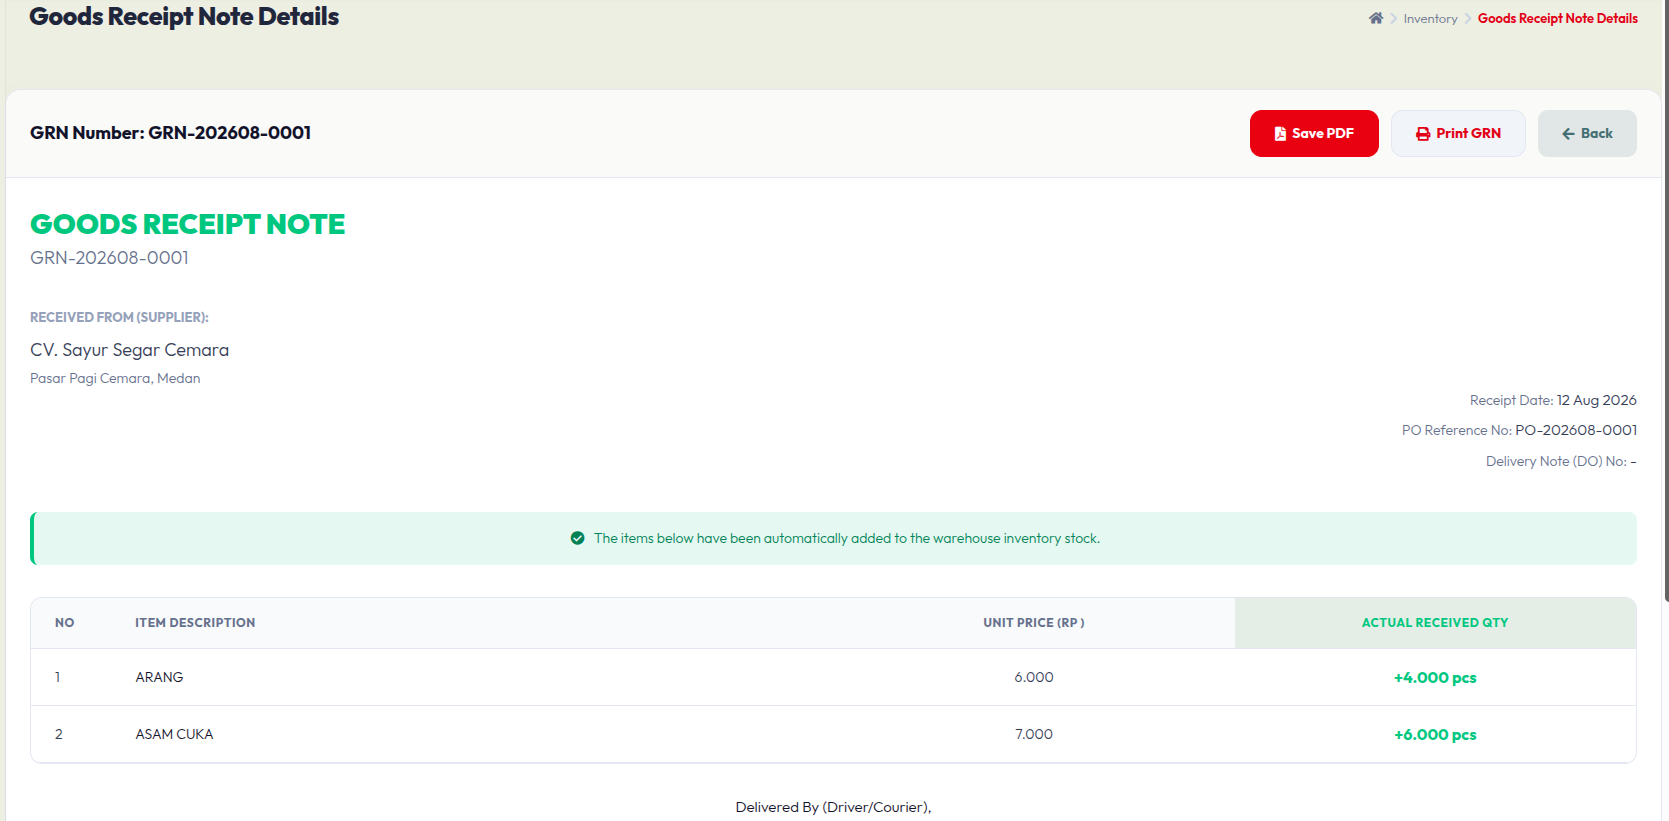
Once saved, the system generates a formal Goods Receipt Note (GRN). This document confirms that the items have been automatically added to your warehouse inventory.
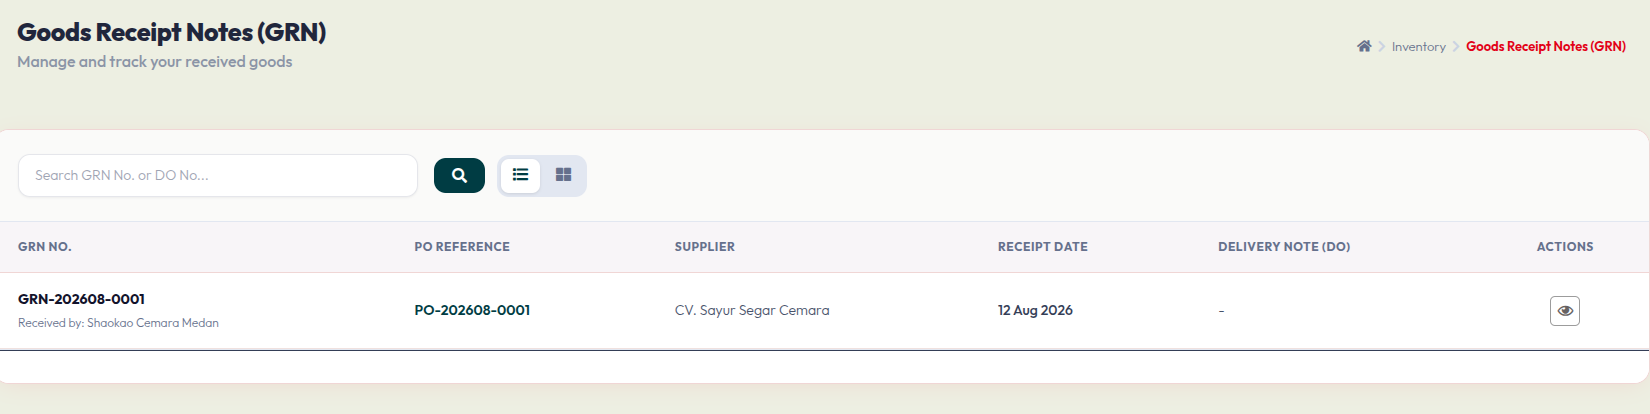
You can track all finalized receipts on the Goods Receipt Notes (GRN) main page, where you can view historical data and verify completed deliveries.